We’re happy to announce we just released the first new version of 2021. Version 2021.1 is another step forward in our journey to deliver the best cost and performance management solution available. In this new version, we’ve incorporated 62 new functions and improvements and have fixed 75 issues. Please continue reading to find out about some of the most notable enhancements.
Download CostPerform 2021.1
The most significant improvements are described below. For the complete list, check out the release notes on our website.
Navigator Improvements
We’ve made the configuration bar on the Navigator a lot cleaner by removing the clutter and making sure it’s always fully available for making quick changes to the configuration:

The configuration bar allows you to quickly change how the incoming and outgoing allocations are presented: which attributes are visible, how objects are grouped, and whether to show the actual allocations or the breakdown to/from a specific layer. You can also navigate back and forward between objects you’ve already visited and quickly zoom in or out or reset the zoom to 100%. Clicking the cogwheels will provide a popup with further configuration options.
Other enhancements in the Navigator are that you can define what value to show on parent-child relations (by clicking the center cogwheel) and the option to a group on multiple attributes, creating a nested grouping to aid in analyzing your cost flows:

User Management
Setting rights to cost models is now easier than ever before. We’ve made significant improvements to the user experience, both for setting privileges and for getting an overview of which privileges have been set. In addition to the overview of cost model rights, CostPerform also offers a complete overview of all the rights that have been set to reports, dashboards, etc.
It is now also possible to distinguish between who can access a resource (report, whiteboard, etc.) and who can edit it. In addition, setting rights to bookmarks is now also possible.
Improvements to importing cost/meta models
You’ve never had this much control over importing cost/meta models. The new interface allows you to comprehensively define what and how to import, like changing the names and symbols:

With the new merge options for meta models, you can add new layers and attributes, remove layers and attributes you don’t need anymore, and overwrite existing layers and attributes if they’ve changed:

Enhancements to the Find Origins function
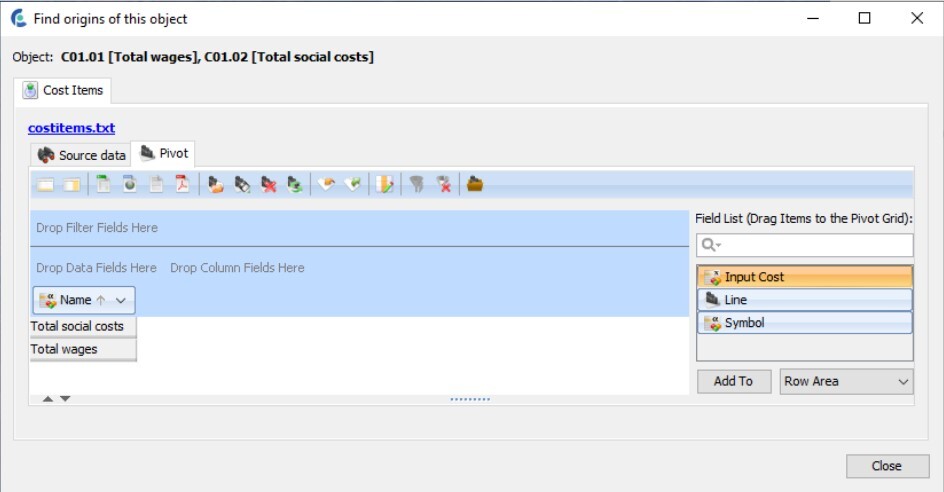
The Find Origins functionality has been enhanced in various ways. Firstly, it allows showing the origins of multiple objects or allocations at once. Furthermore, you can copy the presented data or display it in a pivot:

From the hierarchy view of a rollup and from the Navigator you have the option to show the relative source data (as opposed to the actual source data).
This allows you to display, for instance, the part of your original input shadow values that end up in your products or services.
This can be very useful if your source data is accumulated during the import process.
But wait, there’s more!
Export Resources with Cost Models
Don’t you hate it when you want to share your work with someone else, and you have to export all your resources (whiteboards, dashboards, reports, Big Data, etc.) separately? You’ll be happy to hear you can now export (and import!) everything in one go, alongside your cost models. Simply select what you want to export, and CostPerform will add everything to the export file. It will even scan dependencies and add things you need but forgot to select (e.g., a filter used in a rollup setting).
Using Variables in Tasks
You can now use variables in tasks. This makes setting up tasks and using them repeatedly even easier. For instance, if you import from a different folder each month, you can use “{date:MM}” in a file path to automatically use data from the current month. Another example: if your data file contains data for multiple years, use a Keyset to only use data for the current year. This works in every task, and there’s a convenient help dialog that shows examples of the variables you can use. Simply click a variable to insert it.
And these are just the highlights. For the complete list, check out the release notes on our website.
